Ever wanted to check your garage door from you Android phone?
Now You can Open and Close Your Garage Door with Your Phone.
This "How To" guide is a complete tutorial, taking you through the entire process step by step. I have included a working Android app you can use "as-is" or use it as a starting point and improve it. At the end of the tutorial, I will document some things I would recommend be added to the app.
Let's get started. Open eclipse and start a new project. If you need help setting up your development environment, I have created a detailed step by step guide. Here is a link.
How to Setup Android Development Environment
Create a new project
Project name:
Garage Door App
Build target: I targeted
Android 2.3.1 but I believe the code would run as low as 1.6. So if you phone is not lower than v2.3.1 select the appropriate API
Application name:
Garage Door App
Package name:
com.acm.blog.example.garagedoorapp
Check "Create activity:" and name it "
MainActivity"
Min SDK version:
9 (again if you target a lower API adjust this number to the appropriate API level)
Here is what our app is going to look like when done.
It is made up of three controls.
- An open garage door button.
- A close garage door button.
- And finally a status display which will let us know when the door is open or closed. I also coded it so when you touch the display graphic the app will check the door and update the status.
Let's start coding!
Step 1: Create the layout by editing the
main.xml file already created for us. If you new to Android the layout might be a little confusing. Here is a complete explanation of the layout file.
- Starting on line 1 and ending on line 19 is a "Linear Layout" that encompasses the entire layout. We specify that the orientation is vertical. As new controls get added they appear at the bottom. We also set the background to our brushed aluminum graphic.
- Lines 2-4 are a Linear layout with a TextView for "Garage Door Opener". I wrapped the TextView in a linear layout so I could center it with android:gravity="center_horizontal"
- I used a frame layout on lines 5-12 so that I can layer controls on top of each other. I wanted the progress bar to be dead center of our status graphic.
- Lines 6-8 is our status graphic that is centered with the property android:gravity="center_horizontal"
- Lines 9-11 is the progress bar that we display while making our web service calls in a background thread. Also centered.
- Lines 13-18 is a linear layout (outside of the frame so it appears below it). This linear layout is set to stack the controls horizontally with the following property android:orientation="horizontal". We have two image buttons in this layout.
|
|
Main.xml
Step 2: Before we code our main activity let's create a helper class to make the http calls to the Netduino.
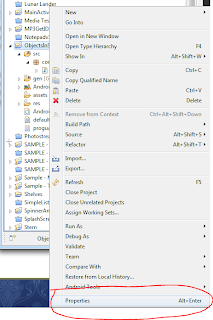
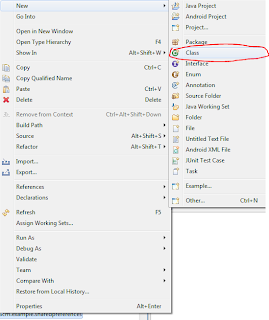
- Right click on the project name and select New > Class
- Name it "WebService.java". Now lets go through the code.
- Line 2 we will make a constant string containing the Netduino IP address
public class WebService {
 private final String WEBSERVICE_URL = "http://192.168.0.153/";
  ...
  ...
- Line 3 declare an HttpClient we will use to make the HTTP cals
public class WebService {
 private final String WEBSERVICE_URL = "http://192.168.0.153/";
 private HttpClient client;
 ...
- Create a constructor and in it instantiate our HttpClient
...
    public WebService(){
        client = new DefaultHttpClient();
    }
  ...
- Create a private method that calls the webservice and parses the retun
private String MakeHTTPCall(String method){
  HttpGet get = new HttpGet(WEBSERVICE_URL + method);
  try {
   // Create a response handler
            ResponseHandler responseHandler = new BasicResponseHandler();
            String responseBody = client.execute(get, responseHandler);
            return responseBody;
  } catch (IOException e) {       // -|
   e.printStackTrace();       // |--> Oops something went wrong!
  } catch (Exception e) {        // |
   e.printStackTrace();       // -|
  }
  return "failed";         //Return "failed" if we encounter an error
 }
- Create a new HTTP get passing in the web service URL and the method name
private String MakeHTTPCall(String method){
  HttpGet get = new HttpGet(WEBSERVICE_URL + method);
  try {
   // Create a response handler
            ResponseHandler responseHandler = new BasicResponseHandler();
            String responseBody = client.execute(get, responseHandler);
            return responseBody;
  } catch (IOException e) {       // -|
   e.printStackTrace();       // |--> Oops something went wrong!
  } catch (Exception e) {        // |
   e.printStackTrace();       // -|
  }
  return "failed";         //Return "failed" if we encounter an error
 }
- Instantiate a new BasicResponseHandler to parse our webservice return into a string
- Create a String variable to hold the return and call execute on the HttpClient
- We pass in the HttpGet variable and the response handler
private String MakeHTTPCall(String method){
  HttpGet get = new HttpGet(WEBSERVICE_URL + method);
  try {
   // Create a response handler
            ResponseHandler responseHandler = new BasicResponseHandler();
            String responseBody = client.execute(get, responseHandler);
            return responseBody;
  } catch (IOException e) {       // -|
   e.printStackTrace();       // |--> Oops something went wrong!
  } catch (Exception e) {        // |
   e.printStackTrace();       // -|
  }
  return "failed";         //Return "failed" if we encounter an error
 }
- Return the result from the HTTP GET call. We wrap the HTTP call in try catch.
private String MakeHTTPCall(String method){
  HttpGet get = new HttpGet(WEBSERVICE_URL + method);
  try {
   // Create a response handler
            ResponseHandler responseHandler = new BasicResponseHandler();
            String responseBody = client.execute(get, responseHandler);
            return responseBody;
  } catch (IOException e) {       // -|
   e.printStackTrace();       // |--> Oops something went wrong!
  } catch (Exception e) {        // |
   e.printStackTrace();       // -|
  }
  return "failed";         //Return "failed" if we encounter an error
 }
WebService.java
public class WebService {
 private final String WEBSERVICE_URL = "http://192.168.0.153/";
 private HttpClient client;
    public WebService(){
        client = new DefaultHttpClient();
    }

    public String IsGarageDoorOpen(){
     for(int i = 0; i < 5; i++){
         String s = MakeHTTPCall("checkdoor");
      if(s.equals("failed") == false)
       return s; //Got a response return result
     }
     return "failed";  //Oh well we tried 5 times without success
 }
 public String ActivateGarageDoor(){
  for(int i=0; i < 5; i++){
   String s = MakeHTTPCall("activatedoor");
      if(s.equals("failed") == false)
       return s; //Got a response return result
  }
  return "failed";
 }

 private String MakeHTTPCall(String method){
  HttpGet get = new HttpGet(WEBSERVICE_URL + method);
  try {
   // Create a response handler
            ResponseHandler responseHandler = new BasicResponseHandler();
            String responseBody = client.execute(get, responseHandler);
            return responseBody;
  } catch (IOException e) {       // -|
   e.printStackTrace();       // |--> Oops something went wrong!
  } catch (Exception e) {        // |
   e.printStackTrace();       // -|
  }
  return "failed";         //Return "failed" if we encounter an error
 }

}
Step 3: Let's edit our Main Activity.
- Line 2 is our progress bar we will display while we check the status of the garage door in a background thread. It is always a good idea to let the user know when the app is working in the background.
- Line 3 is an instance of our ImageView we will use to display the status of the garage door.
- Line 4 is an instance of our web service helper class.
public class MainActivity extends Activity {
 private ProgressBar progressBar1;
 private ImageView status;
 private WebService ws;
Now let's add some code to the onCreate method
- On line 9 we turn of the window title bar.
- Line 12 instantiate the progress bar.
- Line 13 the ImageView we are using to display the status of the garage door.
- Lines 14-19 set the on click listener so we can check the status of the garage door when someone touches the status image. We someone clicks the ImageView we execute an AsyncTask to check the garage door in a background thread.
- Line 20 instantiate our Open ImageButton.
- Lines 21-26 set the on click listener for the open button. When the open button is clicked we activate the garage door with an AsyncTask on a background thread.
- Lines 27-33 is the same for the Close button.
- Lines 34-48 We create a Timer to check the status of the garage door every fifteen minutes again on a background thread.
@Override
 public void onCreate(Bundle savedInstanceState) {
  super.onCreate(savedInstanceState);
        this.requestWindowFeature(Window.FEATURE_NO_TITLE);
  setContentView(R.layout.main);
  ws = new WebService();
  progressBar1 = (ProgressBar) findViewById(R.id.progressBar1);
  status = (ImageView) findViewById(R.id.Status_ImageView);
  status.setOnClickListener(new OnClickListener() {
     public void onClick(View v) {      // Check garage door
      new CheckGarageDoorAsync().execute();   // when status
                 // image clicked
     }
    });
  ImageButton openButton = (ImageButton) findViewById(R.id.OpenButton);
  openButton.setOnClickListener(new OnClickListener() {
   @Override
   public void onClick(View arg0) {
    new ActivateGarageDoorAsync().execute();
   }
  });
  ImageButton closeButton = (ImageButton) findViewById(R.id.CloseButton);
  closeButton.setOnClickListener(new OnClickListener() {
   @Override
   public void onClick(View arg0) {
    new ActivateGarageDoorAsync().execute();
   }
  });
  final Handler handler = new Handler();
  Timer t = new Timer();
  t.scheduleAtFixedRate(new TimerTask() {
   @Override
   public void run() {
    handler.post(new Runnable() {
     public void run() {
      Log.d("z", "check garage door");
      setUI(ws.IsGarageDoorOpen());
     }
    });
   }
  }, 0, 900000);
  new CheckGarageDoorAsync().execute();
 }
}
Lines 56-92 is a method that sets our UI depending on the state of the garage door. If the garage door is open we disable the open button and set the display to "Open" and of course the opposite if its closed.
private void setUI(String mode) {
  if (mode.equals("Open")) {
   ImageButton o = (ImageButton) findViewById(R.id.OpenButton);
   o.setImageResource(R.drawable.open_button_alt); // Open button
               // depressed
   o.setEnabled(false);        // Disable open button
   ImageButton c = (ImageButton) findViewById(R.id.CloseButton);
   c.setImageResource(R.drawable.close_button);  // Closed button up
   c.setEnabled(true);        // Enable close button
   ImageView status = (ImageView) findViewById(R.id.Status_ImageView);
   status.setImageResource(R.drawable.status_open); // Set status
                // graphic
  } else if (mode.equals("Closed")) {
   ImageButton o = (ImageButton) findViewById(R.id.OpenButton);
   o.setImageResource(R.drawable.open_button);  // Open button up
   o.setEnabled(true);        // Enable open button
   ImageButton c = (ImageButton) findViewById(R.id.CloseButton);
   c.setImageResource(R.drawable.close_button_alt); // Close button
                // depressed
   c.setEnabled(false);         // Disable close button
   ImageView status = (ImageView) findViewById(R.id.Status_ImageView);
   status.setImageResource(R.drawable.status_closed);// Set status
                 // graphic
  } else {
   ImageButton o = (ImageButton) findViewById(R.id.OpenButton);
   o.setImageResource(R.drawable.open_button_alt);  // Open button
                // depressed
   o.setEnabled(false);         // Disable open button
   ImageButton c = (ImageButton) findViewById(R.id.CloseButton);
   c.setImageResource(R.drawable.close_button_alt); // Close button
                // depressed
   c.setEnabled(false);         // Disable close button
   ImageView status = (ImageView) findViewById(R.id.Status_ImageView);
   status.setImageResource(R.drawable.status_unknown);// Set status
                  // graphic
  }
 }
Lines 97-117 We create an AsyncTask to check the status of the garage door. Using an AsyncTask allows us the make an http call on a background thread so our app does not become un-responsive and geneate an "ANR" error. If you perform a long task on the UI thread and the user presses a key and there is no response within 5 seconds Android will generate an ANR error message asking the user to wait or to close. You should never perform a network call on the UI thread. We implement three methods of the AsyncTask.
- onPreExecute(). This is performed on the UI thread. We turn on the progress bar indicating we are checking the door.
- doInBackground(). This is performed in a background thread. In this method we check the garage door state by calling our IsGarageOpen method on our web service class. We then pass the results to onPostExecute() method.
- onPostExecute(). This is performed on the UI thread. This method sets all the controls based on the state of the garage door.
private class CheckGarageDoorAsync extends AsyncTask {
  @Override
  protected void onPreExecute() {
   setUI("Unkown");            // While we check disable all buttons and clear status display
   progressBar1.setVisibility(View.VISIBLE); // Display progress bar
  }

  @Override
  protected String[] doInBackground(Void... arg0) {
   String r = ws.IsGarageDoorOpen();    // Make webservice call to check
              // garage door
   return new String[] { r };      // Return result
  }

  @Override
  protected void onPostExecute(String[] result) {
   progressBar1.setVisibility(View.INVISIBLE); // Hide progress bar
   setUI(result[0]);        // Pass result to setUI method to sync the UI
  }

 }
Lines 122-161 We create another AsyncTask to activate the garage door. Here is the complete MainActivity class.
MainActivity.java
public class MainActivity extends Activity {
 private ProgressBar progressBar1;
 private ImageView status;
 private WebService ws;

 @Override
 public void onCreate(Bundle savedInstanceState) {
  super.onCreate(savedInstanceState);
        this.requestWindowFeature(Window.FEATURE_NO_TITLE);
  setContentView(R.layout.main);
  ws = new WebService();
  progressBar1 = (ProgressBar) findViewById(R.id.progressBar1);
  status = (ImageView) findViewById(R.id.Status_ImageView);
  status.setOnClickListener(new OnClickListener() {
     public void onClick(View v) {      // Check garage door
      new CheckGarageDoorAsync().execute();   // when status
                 // image clicked
     }
    });
  ImageButton openButton = (ImageButton) findViewById(R.id.OpenButton);
  openButton.setOnClickListener(new OnClickListener() {
   @Override
   public void onClick(View arg0) {
    new ActivateGarageDoorAsync().execute();
   }
  });
  ImageButton closeButton = (ImageButton) findViewById(R.id.CloseButton);
  closeButton.setOnClickListener(new OnClickListener() {
   @Override
   public void onClick(View arg0) {
    new ActivateGarageDoorAsync().execute();
   }
  });
  final Handler handler = new Handler();
  Timer t = new Timer();
  t.scheduleAtFixedRate(new TimerTask() {
   @Override
   public void run() {
    handler.post(new Runnable() {
     public void run() {
      Log.d("z", "check garage door");
      setUI(ws.IsGarageDoorOpen());
     }
    });
   }
  }, 0, 900000);
  new CheckGarageDoorAsync().execute();
 }

 /*
  * Set UI components Garage Open Open button is disabled Close button is
  * enabled Status graphic - OPEN Garage Closed Open button is enabled Close
  * button is disabled Status graphic - Closed Garage Unknown Open button is
  * disabled Close button is disabled Status graphic - black
  */
 private void setUI(String mode) {
  if (mode.equals("Open")) {
   ImageButton o = (ImageButton) findViewById(R.id.OpenButton);
   o.setImageResource(R.drawable.open_button_alt); // Open button
               // depressed
   o.setEnabled(false);        // Disable open button
   ImageButton c = (ImageButton) findViewById(R.id.CloseButton);
   c.setImageResource(R.drawable.close_button);  // Closed button up
   c.setEnabled(true);        // Enable close button
   ImageView status = (ImageView) findViewById(R.id.Status_ImageView);
   status.setImageResource(R.drawable.status_open); // Set status
                // graphic
  } else if (mode.equals("Closed")) {
   ImageButton o = (ImageButton) findViewById(R.id.OpenButton);
   o.setImageResource(R.drawable.open_button);  // Open button up
   o.setEnabled(true);        // Enable open button
   ImageButton c = (ImageButton) findViewById(R.id.CloseButton);
   c.setImageResource(R.drawable.close_button_alt); // Close button
                // depressed
   c.setEnabled(false);         // Disable close button
   ImageView status = (ImageView) findViewById(R.id.Status_ImageView);
   status.setImageResource(R.drawable.status_closed);// Set status
                 // graphic
  } else {
   ImageButton o = (ImageButton) findViewById(R.id.OpenButton);
   o.setImageResource(R.drawable.open_button_alt);  // Open button
                // depressed
   o.setEnabled(false);         // Disable open button
   ImageButton c = (ImageButton) findViewById(R.id.CloseButton);
   c.setImageResource(R.drawable.close_button_alt); // Close button
                // depressed
   c.setEnabled(false);         // Disable close button
   ImageView status = (ImageView) findViewById(R.id.Status_ImageView);
   status.setImageResource(R.drawable.status_unknown);// Set status
                  // graphic
  }
 }

 /*
  * Check the garage door on background thread with an AsyncTask
  */
 private class CheckGarageDoorAsync extends AsyncTask {
  @Override
  protected void onPreExecute() {
   setUI("Unkown");            // While we check disable all buttons and clear status display
   progressBar1.setVisibility(View.VISIBLE); // Display progress bar
  }

  @Override
  protected String[] doInBackground(Void... arg0) {
   String r = ws.IsGarageDoorOpen();    // Make webservice call to check
              // garage door
   return new String[] { r };      // Return result
  }

  @Override
  protected void onPostExecute(String[] result) {
   progressBar1.setVisibility(View.INVISIBLE); // Hide progress bar
   setUI(result[0]);        // Pass result to setUI method to sync the UI
  }

 }

 /*
  * Activate the garage door on a background thread with an AsyncTask
  */
 private class ActivateGarageDoorAsync extends
   AsyncTask {
  @Override
  protected void onPreExecute() {
   setUI("Unkown");        // While we check disable all buttons and clear
              // display graphic
   progressBar1.setVisibility(View.VISIBLE); // Display progress bar
  }

  @Override
  protected String[] doInBackground(String... arg0) {
   String start = ws.IsGarageDoorOpen();

   String r = ws.ActivateGarageDoor();   // Activate garage door
   for (int i = 0; i < 60; i++) {     // Give the door up to 1 minute to
              // close/open
    try {
     Thread.sleep(1000);     // Pause for 1 second
    } catch (InterruptedException e) {
     e.printStackTrace();
    }
    r = ws.IsGarageDoorOpen();     // Check the door status
    if (r.equals(start) == false && r.equals("failed") == false)
     break;         // The door is done opening/closing
   }
   return new String[] { r };      // Return the status of garage
  }

  @Override
  protected void onProgressUpdate(String... values) {

  }

  @Override
  protected void onPostExecute(String[] result) {
   progressBar1.setVisibility(View.INVISIBLE);
   setUI(result[0]);
  }

 }
}
You can get the entire project source code here
To learn how to build the hardware required to monitor and control your garage door read my post here.
http://androidcodemonkey.blogspot.com/2011/09/mobile-app-to-monitor-open-and-close.html. If you have any questions please feel free to leave a comment. I usually answer questions within a day or two.


